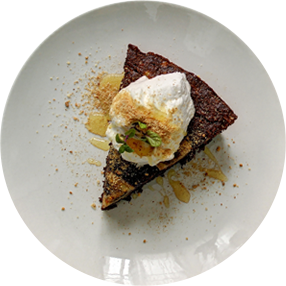
Plazma cake with salted caramel cream

Basic Information:
 Preparation Time: 1h + 18h for cooling
 Size: 6
 Difficulty:

Ingredients:
Crust:
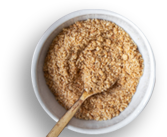
600 g Ground Plazma
150 g roasted peanuts
200 ml orange juice
100 g dark chocolate
100 g butter
100 g Plazma
Mousse:
120 g sugar
500 ml whipping cream
¼ teaspoon of coarse sea salt
6 g gelatine
1 egg
Decoration:
250 ml whipping cream
2 sachets vanilla sugar
1. Step
Caramel cream should be prepared the day before. Pour 100g of sugar into a saucepan with a thicker bottom and let it melt over low heat. Do not mix it, just shake it occasionally.
2. Step
In another pan, heat the whipping cream. When the sugar has melted, add salt and whipping cream, stirring constantly.
3. Step
Be careful because the whipping cream will froth up a lot. Mix until the pieces of caramel melt, then leave the caramel cream to cool to room temperature and transfer it to the refrigerator.
4. Step
The next day, take a 25 cm diameter mold with a removable bottom and line the bottom with baking paper.
5. Step
Pour Ground Plazma, roasted peanuts and orange juice into a separate bowl, then add melted dark chocolate and butter. Finally, add crushed Plazma and mix everything well to get a homogeneous mixture. Spread the mixture evenly in the previously prepared mold.
6. Step
Pour gelatine into a saucepan and cover it with 3-4 tablespoons of cold water, then leave it to swell.
7. Step
Take the caramel cream out of the fridge and beat it into firm whipped cream.
8. Step
Separate the egg white from the yolk, then beat the egg white together with 20g of sugar until stiff peaks form.
9. Step
Put the gelatine over low heat to melt.
10. Step
Combine the egg yolk with the caramel whipped cream, and then, stirring constantly, add the melted gelatine.
11. Step
Finally, add the beaten egg white and gently combine everything. Spread the resulting mousse evenly over the Plazma crust and put it in the refrigerator for 6 hours to set.
12. Step
Before serving, beat whipping cream with vanilla sugar and decorate the cake.
13. Step
Your dessert is ready!

Author:
Milkica Crevar/Mimi’s Kingdom

Have you tried this recipe?
If yes, take a picture and tag @plazma_zvanicna or use #plazmasticarnica

Simillar recipes


2026 Copyright | All rights reserved | Privacy Policy | Contact | Created by Webtise
Uspešno ste se prijavili za newsletter!

Some stories are sweeter when they're just yours!
Sign up to our Newsletter and get updates about Plazmastičarnica stories that we prepare weekly just for you!