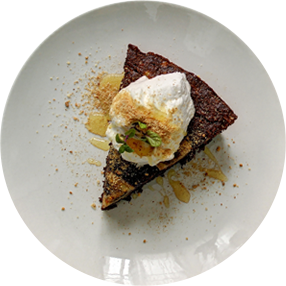
Napoleon cake with Plazma cream

Basic Information:
 Preparation Time: 1 h + 4h cooling
 Size: 8
 Difficulty:
Ingredients:
Pastry:
260 g cold butter
460 g soft, wheat flour
1 egg
160 ml ice cold water
1 tablespoon apple cider vinegar
½ teaspoon salt
Cream:
750 ml milk
1 vanilla bean
6 egg yolks
150 g sugar
45 g starch flour
50 g room temperature butter
50 ml whipping cream
40 g powdered sugar
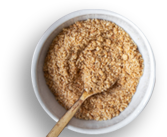
100 g Ground Plazma
Decoration:
100 g Ground Plazma
Fruit of your choice
1. Step
First, knead the dough for the pastry. Add salt to the measured flour, mix, then add cold butter, coarsely grated. Rub the butter into the flour, make a well in the middle, then add the rest of the ingredients to the well: egg, vinegar and ice cold water. Knead smooth, elastic dough, then divide it into 12 balls.
2. Step
Gently wrap the balls in transparent foil, then place in the refrigerator to rest for approximately 2 hours.
3. Step
After that, preheat the oven to 210 °C. Line two trays with baking paper. Roll out each dough ball on a floured surface to a diameter of 22 cm. Prick the dough circle with a fork. It doesn't matter if the circle is not regular, because the excess dough is cut off after baking. The cake will have a diameter of 18 cm, and the dough shrinks during baking, so it is important that the diameter is significantly larger before baking.
4. Step
Bake the pastry for 7-8 minutes in a preheated oven. Immediately transfer it from the baking paper to a kitchen towel and use an 18 cm diameter plate to cut off the excess dough, and leave the formed disc to cool. Collect the excess dough on the side. Continue with the remaining 11 dough balls. While one pastry sheet is baking, prepare another, and place it on another baking tray lined with baking paper.
5. Step
While the dough balls are in the fridge, prepare the cream. Pour the milk into a large saucepan and add the vanilla bean. Heat until it boils.
6. Step
In a separate dish mix sugar, starch flour and egg yolk to get a mixture without lumps.
7. Step
Remove the vanilla bean from the hot milk. Add hot milk to this mixture, little by little, to warm the egg yolks. This will prevent them from curdling.
8. Step
Return the warm mixture with egg yolks to the hot milk and stir over low heat until it thickens.
9. Step
Remove the hot mixture from the heat, add butter at room temperature and mix, then cover the surface of the filling with transparent foil to prevent a crust from forming. Allow to cool to room temperature, then cool further in the refrigerator.
10. Step
Just before filling, beat the whipping cream with powdered sugar. Add Ground Plazma and whipped cream to the cooled cream and combine everything.
11. Step
On the plate on which the cake will be placed, put a spoonful of cream, then the first pastry sheet. Spread 2-3 tablespoons of cream over the first pastry sheet, then place the second pastry sheet. Continue like this until the twelfth sheet. Lightly press the cake and put it in the fridge. Do not use all the cream.
12. Step
After 2 hours, take the cake out of the fridge, press down a bit again, then spread the rest of the cream on the rim and on the surface. Finely chop the excess baked pastry, then add 50 g of Ground Plazma to it and sprinkle the mixture abundantly on the cake from all sides. Leave it in the fridge overnight, then serve.
Author:
Milkica Crevar/Mimi’s Kingdom

Have you tried this recipe?
If yes, take a picture and tag @plazma_zvanicna or use #plazmasticarnica

Simillar recipes


2026 Copyright | All rights reserved | Privacy Policy | Contact | Created by Webtise
Uspešno ste se prijavili za newsletter!

Some stories are sweeter when they're just yours!
Sign up to our Newsletter and get updates about Plazmastičarnica stories that we prepare weekly just for you!